Choose activewear by matching the clothes to your activity, checking how they move on your body, and favoring the features you will actually use. This activewear selection guide walks you through fabric, fit, support, build, and value so you can build a useful workout closet without buying extras you do not need. Start with your training needs, then use the fit checks below before you buy.
What should you know before choosing activewear?
Before you shop, note your main workouts, where you train, and what bugs you about your current clothes. These details give you a better base for comparing garments than looks alone. Write a short shopping brief you can use in a fitting room or online.
Include these details:
- Your usual activities: List what you do, such as strength work, walking, running, cycling, or yoga.
- Your workout setting: Note whether you train inside, outside, or both, and whether you need layers you can take off.
- Your biggest clothing frustrations: Be clear about slipping waistbands, tight shoulders, rough seams, or weak coverage.
- Your laundry routine: Decide how often you can actually wash and dry workout clothing.
- Your spending limit: Set a budget and note which replacement would help most first.
Check your current clothes before you add anything to your cart. Keep pieces that still work, even if they are not sold as tech gear. Your goal is to fix real problems, not replace everything with a matching set.
Choose your activewear step by step
- Match each purchase to your main activity.
Give each item one job. A helpful note might be shorts for indoor cycling or a top that stays comfy during overhead lifts. If you cannot say when you will wear it, leave it on your list instead of buying it now.
Use your real moves to guide the test. For yoga, reach overhead, fold forward, and try a lunge. For lifting, use your usual squat, hinge, and press positions without weights. For running, jog in place and see if anything shifts.
Check special needs before you choose a general outfit. Ask your studio about dress rules or see whether your cycling shorts need a padded liner. Treat gear fit as part of the purchase, not something to figure out during your first session.
If you do several sports, decide which pieces can work for more than one. Try a top through moves from both workouts rather than assuming training means it works for all use. Keep special buys tied to a clear need.
Expected outcome: You should know which workout each item supports. Skip anything that looks nice but fails the moves you need. This keeps your sportswear selection on use, not on extra sets.
- Read fabric info, not just the name.
Read the fabric tag and product copy before you judge cloth by touch. Look for notes on sweat control, drying, fabric weight, and use. Decathlon lists sweat wicking and fabric weight as useful cues, especially as workout load rises. (decathlon.com)
Keep three terms apart when you read: moisture-wicking means moving sweat off skin; quick-drying means how fast the cloth dries; and airflow means how well heat and damp vapor can leave. One claim does not prove the other two. REI treats wicking and drying as separate traits in running clothes. (rei.com)
For sweaty workouts, look for moisture-wicking clothes, including good nylon or polyester pieces. The AAD recommends these options when you want workout clothing that helps manage sweat. That is a good start, but it does not mean every synthetic cloth will feel the same. (aad.org)
Look at the whole garment, not just the fiber mix. Check the lining, waistband, mesh panels, and care rules along with the main cloth. If a product uses only brand names, look for a plain-English note on what the tech does.
Expected outcome: You should be able to tie each fabric claim to your workout needs. If a claim stays vague, do not pay extra for it just because it sounds technical.
- Choose a fit that works in motion.
Use the size chart as a start, then test the garment on your body. Follow the brand’s measuring steps and note whether the chart gives body size or garment size. Pick the size that fits your movement, not the label you know.
For bottoms, check the waistband, hips, thighs, rise, and length on their own. Sit, squat to a comfy depth, and lift one knee. Notice whether the waistband folds, the crotch pulls, or the hems catch. Try the next size or another cut if one area fits and another does not.
For tops, reach forward, lift both arms, and turn your torso. Watch for pull across the back, pressure at the underarms, and a neck opening that shifts too much. Test the top with the bottoms you plan to wear so you can judge the full outfit.
Do not treat discomfort as proof of support. The AAD notes that tight clothes and gear can rub and upset skin, and its workout advice calls for a looser fit. Make room where you need it, and do not keep rubbing just to get a certain look.
Expected outcome: You should finish the move test without fixing your clothes again and again. If you keep adjusting the same spot, treat that as useful input and try a different shape, not just a different color.
- Test coverage, opacity, and stretch recovery.
Check coverage in the poses your workout needs, not only when you stand still. Use a mirror to check the front, sides, and back. Wear the underwear you plan to train in so the test matches real use.
For leggings or fitted shorts, bend and squat in your normal range. Look for spots where the cloth turns more see-through than you want. If you can, repeat the test under bright light instead of using only a dim fitting room.
For loose shorts, sit, lunge, and raise one knee. Decide whether the leg opening and any liner give you the coverage you want. For tops, check what happens during forward folds, overhead reaches, and floor work.
Stretch the garment only as much as you would in normal wear, then let it go. Check whether the waistband, knees, or elbows look warped after. Avoid yanking store items hard; this should be a real fit check, not a damage test.
If an item gets too sheer or too tight in your normal moves, compare another size and another design. Do not assume a bigger size will fix every issue. Check whether the larger option still stays in place.
Expected outcome: You should feel good about the garment’s coverage during your full routine. If you would spend the workout worrying about exposure or fixing your outfit, keep looking.
- Select support garments with a separate fit test.
If you wear a sports bra, check it on its own, not as part of the matching top or leggings. Choose support based on your activity, then test the fit instead of trusting the label alone. University of Colorado sports-medicine advice says to check sports-bra fit and likely rub spots. (ucdenver.edu)
During your fitting, check the band, straps, cups, and arm openings one by one.
Raise your arms and see whether the band shifts a lot.
Bend forward, turn, and do a light version of your usual activity.
Look for spots that dig, rub, gape, or leave you feeling poorly supported. (ucdenver.edu)
Make small changes before you reject the garment, but do not force a bad design to work. Try another size or build if you still cannot get good support. If you are unsure, think about an in-person fit instead of ordering many versions based on looks alone.
Use the same careful approach for underwear and liners. Wear them during the outfit test, check where the edges sit, and make sure the full set feels fine when you sit and move. Follow any special use steps that come with the garment.
Expected outcome: Your support layer should feel right during movement, not only while standing. Keep that choice separate from whether it matches the rest of the set; the support piece needs to earn its place.
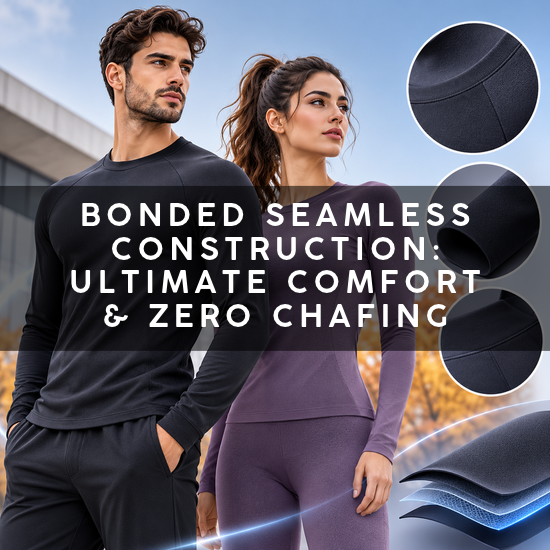
- Inspect seams, pockets, and finish details.
Turn the garment inside out and run your fingers along the seams. Check the underarms, inner thighs, waistband, and any spot that will sit under gear or another layer. REI suggests flat or welded seams placed away from spots that rub during running; use that idea to check likely contact points in your own sport. (rei.com)
Look closely at the stitching and joins. Check for loose threads, skipped stitches, raw edges, or a zipper that catches in normal use. Compare more than one item if you are not sure if something is a design feature or a build flaw.
Test pockets with the items you really plan to carry. Put your phone in its case, place it in the pocket, and walk or jog. Sit down to see whether it presses on you. Check that closures open easily and that you can reach what you need.
Use details only when they solve your problem. A pocket is not needed if you always use a locker. An adjustable waistband deserves a closer look if you often need help keeping bottoms in place. Make those choices on purpose instead of thinking more features always mean better clothing.
Expected outcome: You should know which details help the garment and which just add decoration. Do not let a nice-looking feature hide bad build quality elsewhere.
- Build an outfit for your training space.
Try the whole outfit together, plus any outer layer you plan to wear. For outdoor exercise, think of a sweat-moving base, extra warmth if needed, and weather cover rather than one heavy garment for all use. REI’s base-layer advice treats fabric, weight, and fit as separate choices. (opt-outside.rei.com)
Check how the layers work together. Bend your elbows, reach overhead, and turn while wearing the full set. Make sure sleeves do not bunch up and that you can take off a layer without a fight.
For wet-weather running, choose quick-drying clothes instead of cotton next to your skin. REI warns against cotton for cold or wet runs because it soaks up water and dries slowly. Check the weather claims of the outer layer on their own, apart from the shirt’s fabric claims. (zippy.rei.com)
For outdoor use, check the features that fit your route and the weather. REI lists UPF-rated cloth and reflective accents as running-clothing options. Do not assume a long sleeve has a tested sun rating or that a bright panel is reflective. (rei.com)
Expected outcome: You should have a clothing mix that works for your usual setting. If one layer ruins the fit of the layer under it, rethink the mix before you buy either piece.
- Compare value against your real priorities.
Set your must-haves before you compare prices. These may include support that feels good, secure coverage, room in the shoulders, or a pocket for your phone. Remove anything that misses those needs before you look at color or discounts.
For the rest, make a simple chart with four columns: intended workout, fit test result, useful features, and price. Add a short note about care needs or any open concern. This makes it easier to compare the garments themselves, not the ad around them.
Spend your budget on the problem that matters most. If your current top works but your shorts need constant fixing, replace the shorts first. If two choices pass your checks equally well, the cheaper one is fine; you do not need a special reason to spend less.
Pause before you buy duplicates. Try one garment through your normal routine before you buy several colors, as long as you know the return rules and plan to keep what you wear. A good fitting-room test helps, but it is not the same as real use across workouts.
Expected outcome: Each purchase should have a clear job and a price you are happy to pay. A practical gym wear guide should narrow your choices, not tell you that every session needs a new outfit.
- Check care steps and return rules before you pay.
Read the care label while you are still deciding. Ask whether you can truly follow the washing and drying steps between workouts. If a garment needs a routine you will not keep up with, count that in the choice before you buy.
Follow garment-specific care instead of one rule for every piece of performance apparel. The brand says to use mild soap and line dry many items, while some technical pieces need different care. Its care notes also warn that fabric softener can hurt moisture-wicking and quick-drying performance. (patagonia.com)
Check the retailer’s real return rules for the item and store. Look for the deadline, tag rules, final-sale items, hygiene rules, and whether refunds or swaps are allowed. Do not assume that an unworn fitting-room return and a return after exercise work the same way.
When you order online, save the product note, size chart, and order confirmation. Try clothing on indoors with tags still on, and finish your move checks before you remove packaging or wear it for exercise.
Expected outcome: You should know how you will care for the garment and when your buy becomes final. Clear up doubt before you pay instead of trusting a return policy you have not read.
- Test one outfit before you grow your wardrobe.
Once you keep an item, wear it for a familiar workout before you count on it for a hard event or long session. Pick a routine where you can see how the clothing behaves without also dealing with new gear or new moves.
Afterward, make short notes. Write down whether the garment stayed in place, whether any seams bugged you, whether the pockets worked, and whether the coverage felt right. Be specific: waistband folded during seated exercises helps more than not comfortable when you shop next time.
Wash the clothing as the label says, then check the fit and finish again. Doctors recommend washing gym clothes after you wear them, so keep that in mind when you plan your rotation. Do not build a wardrobe around wearing the same workout gear again and again without washing it.
Use what you learn to make the next buy more exact. Keep the style name and size of pieces that work, but still check product details before you order again. Buy more garments when they fill a real gap in your routine.
Expected outcome: You should finish with proof from your own use, not only a first look. Add pieces slowly until your clothing rotation fits your schedule without leaving you short of clean, comfy options.

What should you do if your activewear still feels wrong?
If activewear still feels wrong, find the exact problem and test that part of the garment again before you change your whole wardrobe. Compare one thing at a time, such as size, waistband shape, seam place, or layering. That gives your next sportswear selection a clearer goal.
Use this troubleshooting checklist:
- Repeated slipping: Compare another cut and another size. Repeat your move test instead of just tightening everything.
- Restricted movement: Find where the pull starts, then try a design with more room there.
- Uncomfortable contact points: Check the seam, label, pocket edge, or overlap at the exact spot.
- Poor coverage: Recheck the outfit in your exercise poses and compare another length, rise, or fabric.
- A bad laundry routine: Rethink your rotation or pick clothes with care steps you can follow.
Do not keep testing clothing that causes pain or lasting irritation. Set it aside and get proper professional advice if the problem keeps going. Pick your next item based on what you learned: easy movement, good coverage, and a clear job in your routine matter more than finding a so-called perfect outfit.
Q&A
Question: What is the most important first step when choosing activewear?
Short answer: Start by naming your main workouts, training setting, current clothing problems, laundry routine, and budget. That helps you choose garments for real needs and activities instead of buying based only on looks, trends, or tech-sounding claims.
Question: Are moisture-wicking, quick-drying, and breathable fabrics the same thing?
Short answer: No. Moisture-wicking means moving sweat away from your skin, quick-drying means how fast the cloth dries, and airflow means how well heat and moisture vapor leave. A garment may claim one feature without doing well in all three, so link each claim to your real workout needs.
Question: Should you simply size up if leggings or shorts feel tight or become sheer?
Short answer: Not always. Sizing up may help in some cases, but it can also create new issues, such as slipping or weak support. Compare another size and another design, then repeat your move checks to see whether the garment still stays in place and gives the coverage you want.
Question: When is it reasonable to buy duplicates of an activewear item?
Short answer: Wait until you have tested one item during a familiar workout, washed it as the label says, and checked how it fits and holds up after that. If it still works well and fills a real gap in your clothing rotation, then buying more colors or duplicates can make sense.